.svg "image2vector (1)")
What's In The Box
- N1 Launch Monitor Sensor
- Calibration Board
- Power Adapter and Cable
- Ethernet Cable
- Ethernet -> USB 3.0 adapter
- Mounting Screws
- Level
- 12 High-Quality Marked Balls
Ceiling Mounting the N1 Launch Monitor
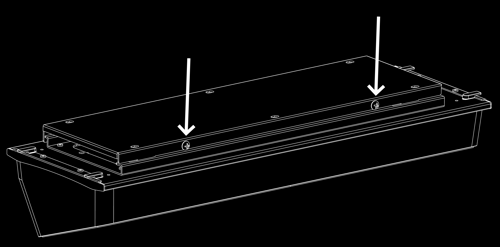
- Your N1 unit ships with the mounting plate already attached to the launch monitor. Using a Philips screwdriver, remove the two retention screws to separate the mounting plate.
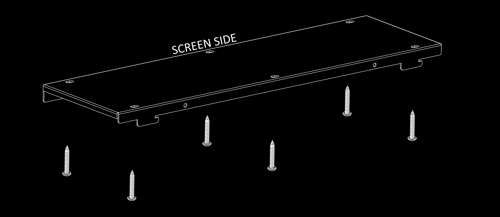
- Using the 6 included screws, attach the mounting plate to a suitable surface. The included screws are appropriate for attaching to a solid substrate, such as plywood or structural lumber. If such a surface is not available, use the appropriate anchors for your situation (not included) to secure the mounting plate to the ceiling.
Refer to placement guidelines to ensure the unit is located correctly relative to your hitting surface. - Attach the N1 to the mounting bracket by inserting, rotating, and sliding.
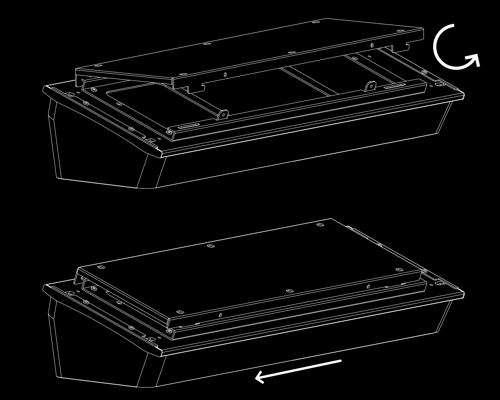
- Secure the assembly by re-inserting the retention screws removed in step 1.
How to Download
- Download the current version of the Pio Software Package, found in the 'Latest Version' section above.
- Right click the Pio Software Package file and select “Run as Administrator”
- Click the “Install” button when the setup displays Microsoft Visual C++ Redistributable Package
- Click the “Next” button when the setups displays the Welcome screen
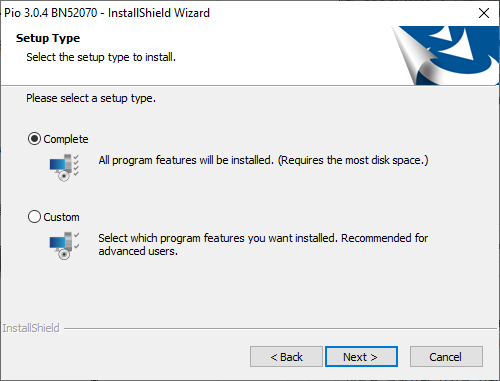
- In the subsequent setup window, choose the desired type and click the “Next” button
- Complete: all components will be installed (recommended)
- Custom: you select the components to be installed (advanced)
- Complete: all components will be installed (recommended)
- Click the “Install” button to begin the installation
- Click the “Finish” button when prompted to complete the installation
- Restart your computer
- Now, you’ll see a shortcut for the calibration tool titled “N1 Calibration” on your desktop!
How to Complete N1 Configuration
Prerequisite: the user account on your PC needs to have administrator privileges- Plug the included USB 3.0 adapter into an open USB 3.0 port on your computer
- With the other end plugged into the N1, plug the remaining end of an Ethernet cable into the Ethernet side of the included adapted
- Turn on the N1
- Download the N1 Configuration tool for easy setup.
- Once downloaded, right click on the “n1-config.exe” file and click “Run as Administrator” with your volume on
- The N1-config.exe tool automatically handles computer settings configuration for your NVISAGE N1
- When the configuration tool is finished configuring your computer for the N1, you’ll hear “Finished configuring your computer” and see that text in the black window on the screen. Press any key to close the auto-configuration tool.
Advanced N1 Configuration (no USB dongle)
- Plug the ethernet connection from the N1 directly into your PC’s ethernet port. For PC’s with multiple ethernet ports, make sure to connect the N1 to your highest bandwidth port.
- Turn N1 device on
- In your PC’s control panel, navigate to ‘Network & internet’, and click on “Network Sharing Center’.
- Select ‘Change Adapter Settings” from the left options. Right click on your ethernet adapter connected to your N1, and click on ‘Properties’.
- Next scroll down and select ‘Internet Protocol Version 4 (TCP/IPv4), and then click 'Configure'.

- Now, move over to the “Advanced” tab. Ensure the following settings are applied:
- Jumbo Frame > Set to the highest value (Typically 9014 bytes)
- Receive Buffers > Set value to 256
- Transmit Buffers > Set value to 256
- Run calibration to ensure connectivity is sufficient.

N1 Calibration Program
To open the N1 Calibration app, please double click the N1 Calibration shortcut on your desktop. Conversely, you can find the app in your hard drive by opening File Explorer and navigating to C:\Program Files\NVisage\Pio\Tools\N1Calibration.exe
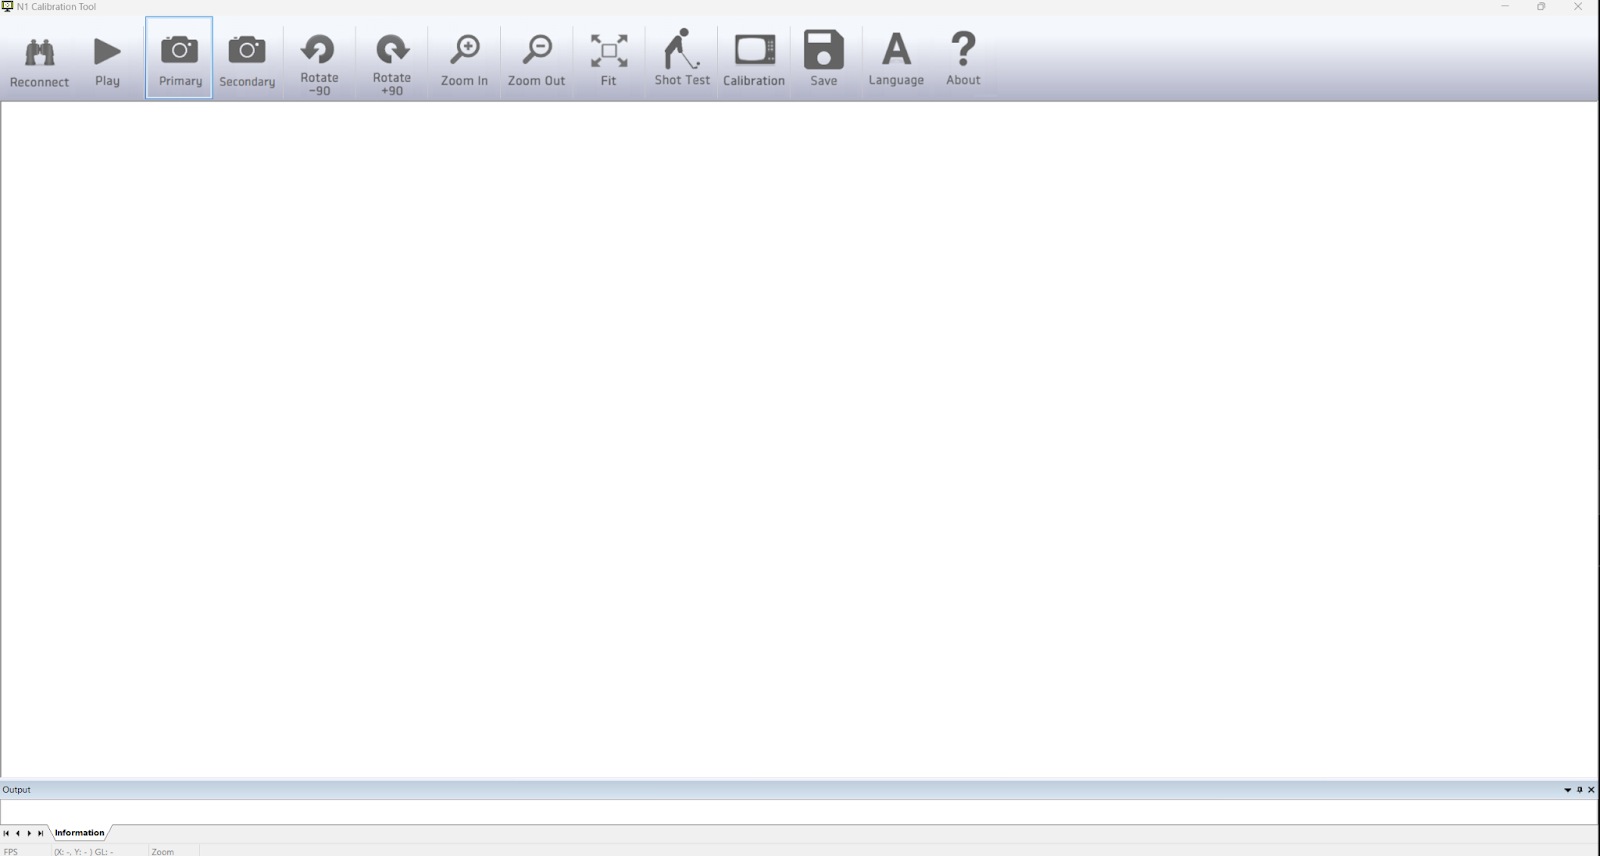
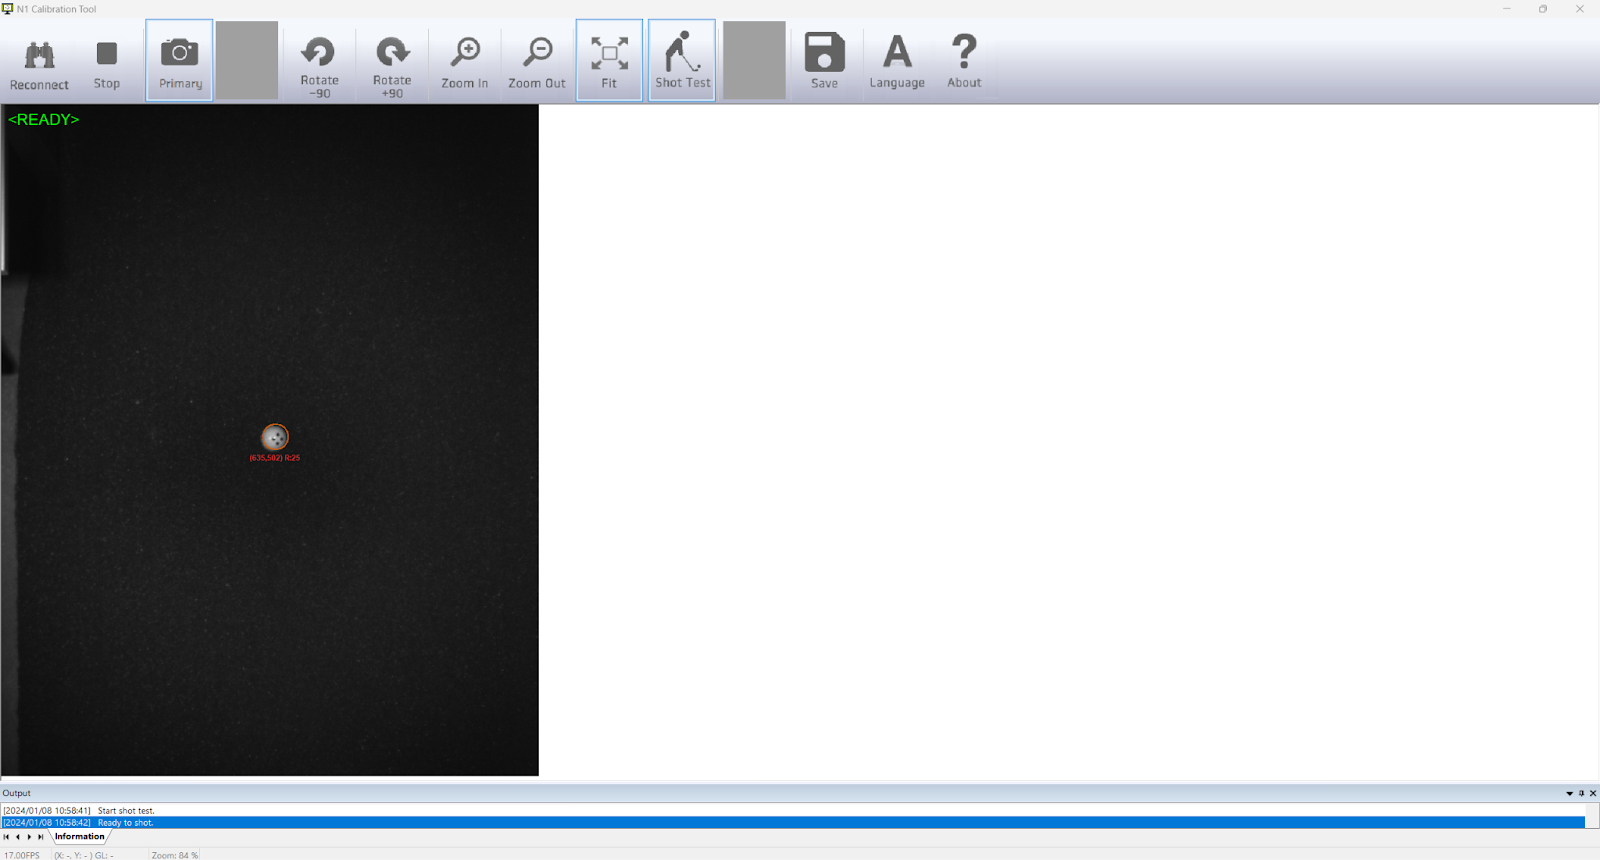
When you first open the N1 Calibration app, you should see an empty home page, looking like this:
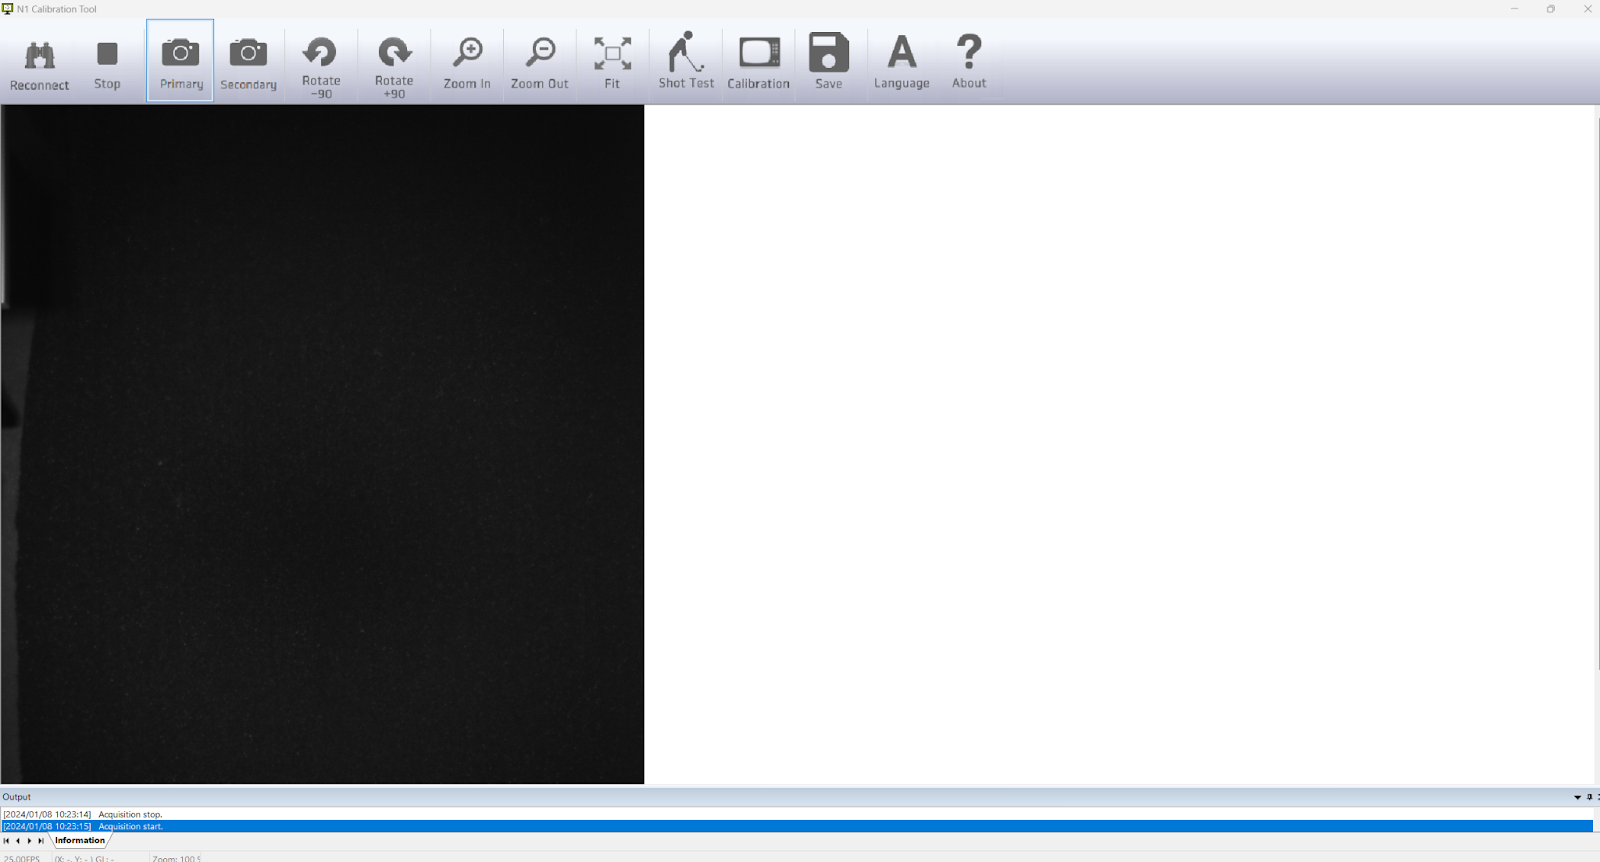
If your N1 unit is on and you successfully completed the configuration in the prior steps, pressing the Play button will immediately provide you with a video feed of your hitting area, similar to this:
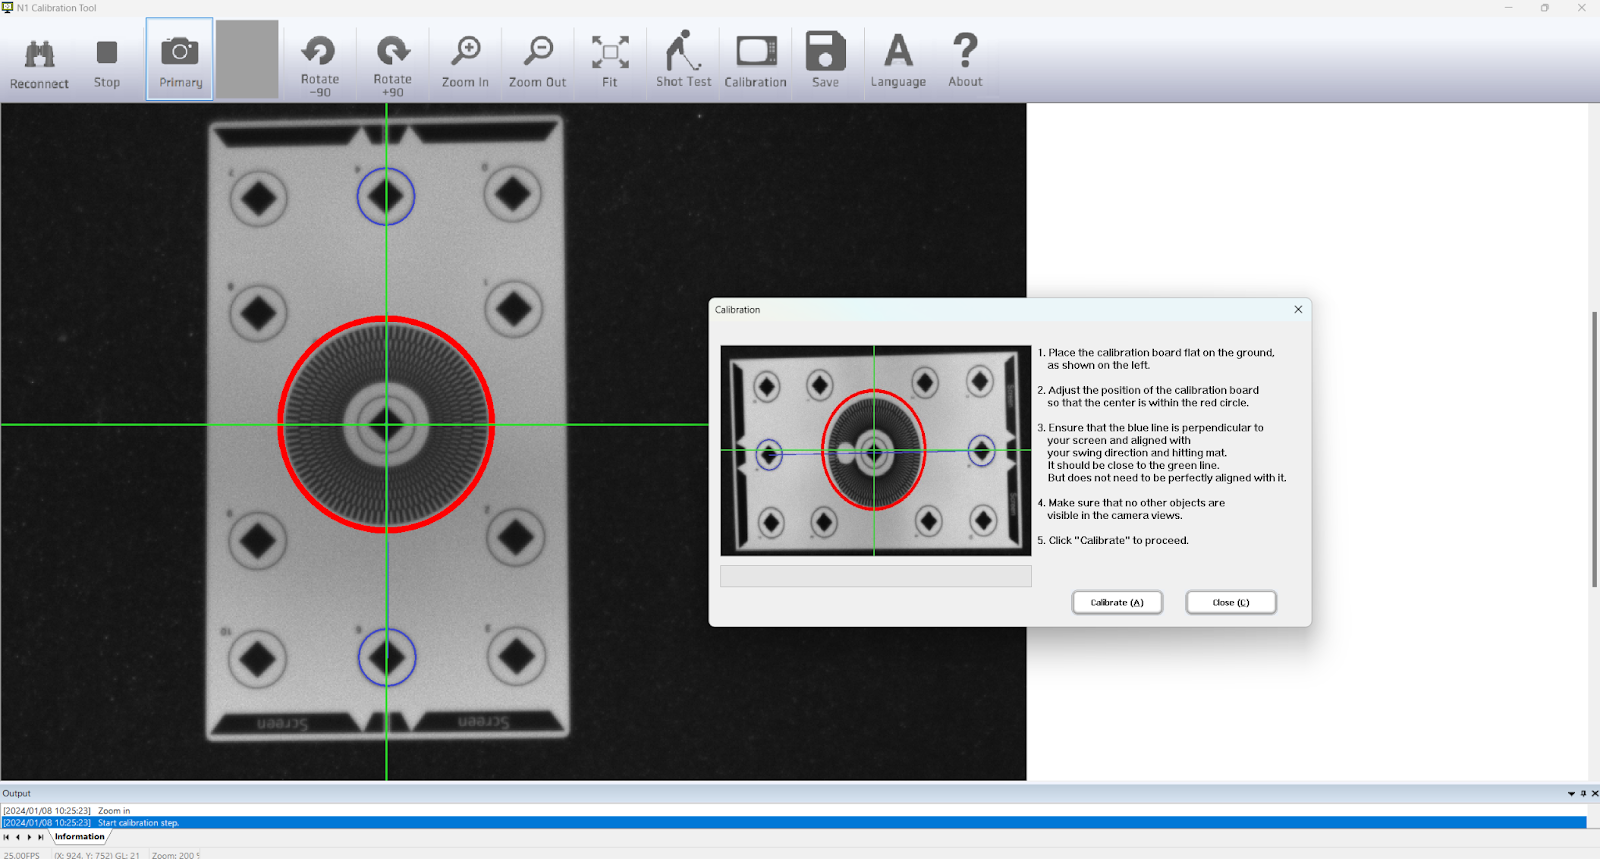
If this is your first time using your N1 unit, or the N1 unit has moved locations since its last use, you’ll need to calibrate the unit for the hitting space. In order to begin configuring your unit, click on the Calibration button on the top toolbar. A popup containing instructions will appear, like this:
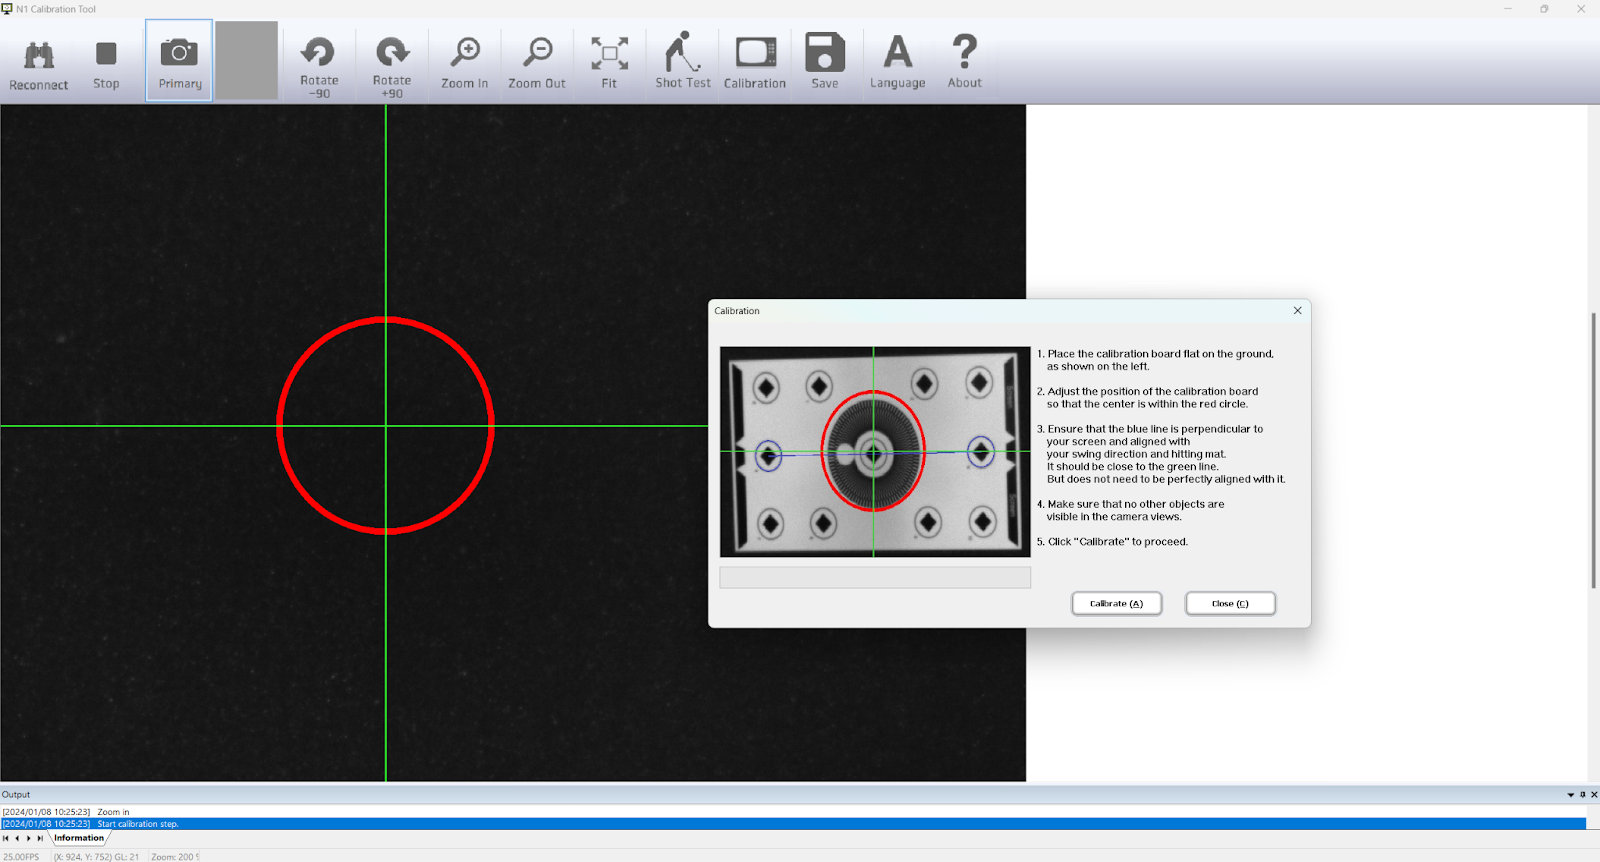
Place the included calibration board perpendicular to the N1 unit, with the end notated “Screen” facing towards the N1 unit. Using the red circle and blue orientation line, make sure that the center of the “bullseye” on the calibration board is within the red circle on your screen, and that the calibration board is straight and parallel to the blue line, as shown here:
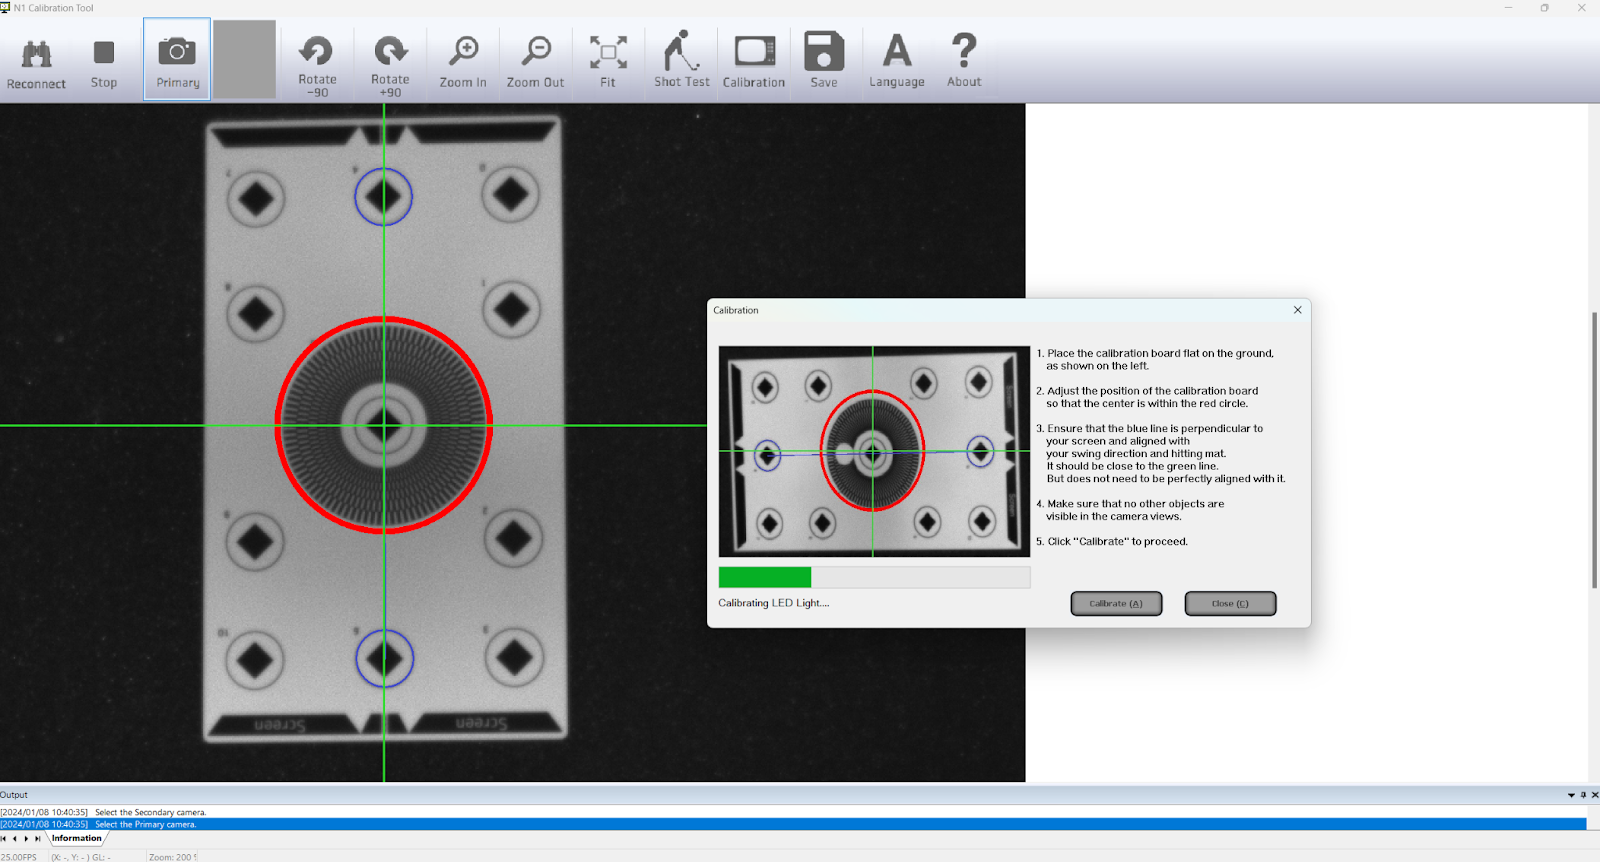
Once the calibration board, is placed, press the “Calibrate (A)” button on the calibration popup to begin auto-calibration:
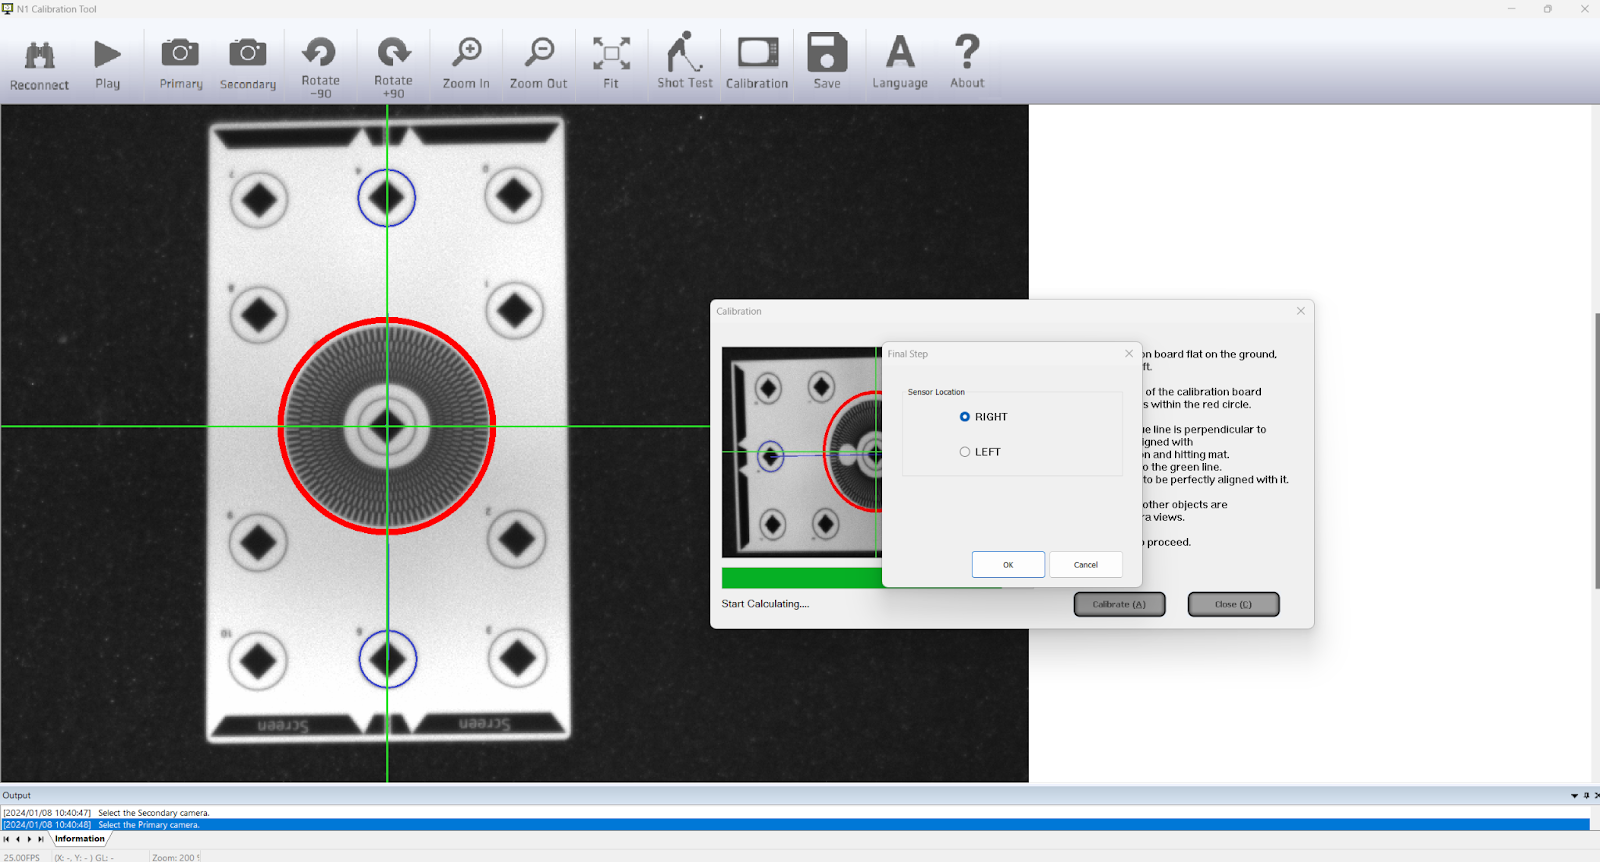
If prompted, select “RIGHT” when asked for a Sensor Location:
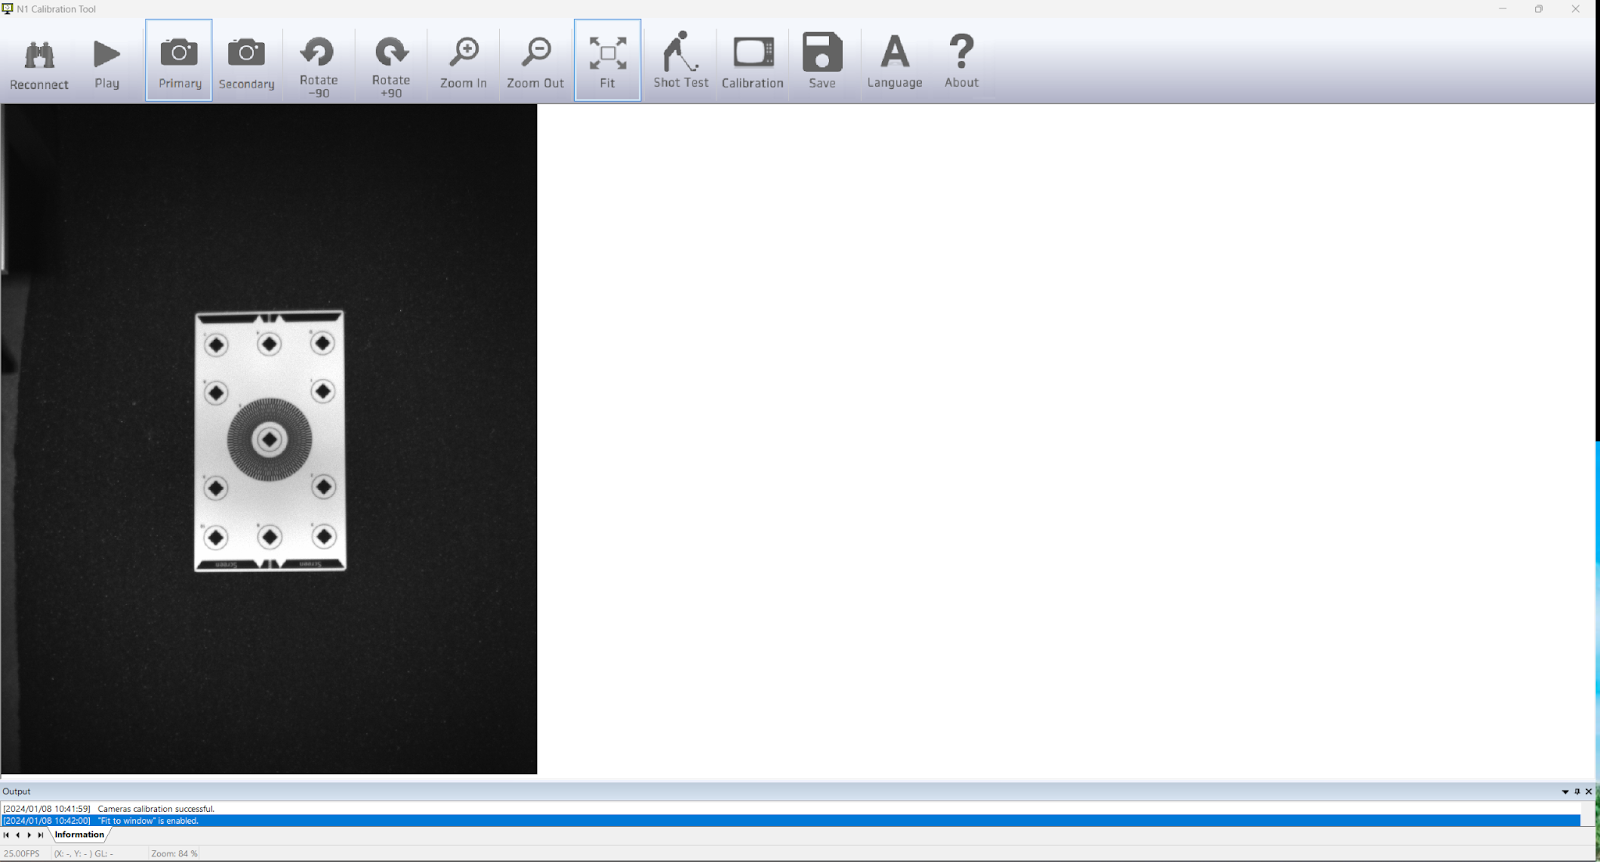
If calibration is successful, you’ll see a popup notating that the calibration was successful, and the calibration window will automatically close.
You’ll then be brought back to the home screen, with your calibration board still fully in view:
Place one of the 12 included “four dot” marked golf balls approximately where the “bullseye” of the calibration board was located, facing at least one group of dots towards the N1 unit:

Now we’re ready to test our shot! Click “Shot Test” on the top toolbar and you’ll immediately be asked “Are you testing with a putter?”
If you are about to putt with a putter, click Yes. If you are about to swing with a club aside from a putter, click No.
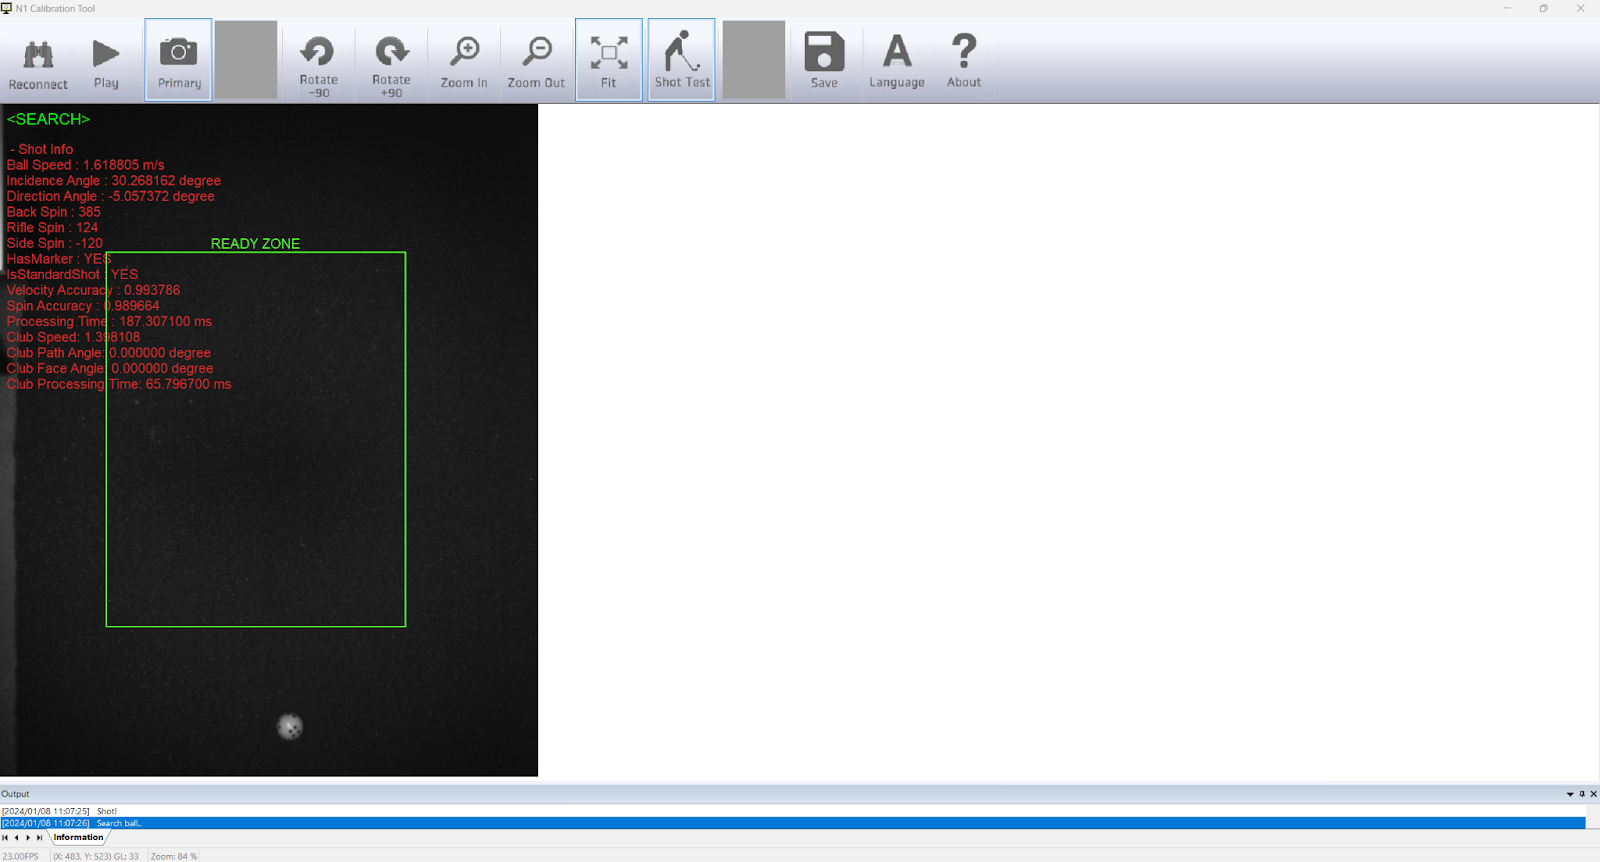
Once you’ve selected your option, the N1 unit will look for the ball in the hitting area. When the N1 unit finds a ball, you’ll see a green READY indicator at the top left and there will be a circle around your ball, like this:
Once a shot is read, the shot data will appear on-screen, like so:
Your N1 unit is now ready to read another shot. Simply set an NVISAGE marked ball within the ready zone to set up another shot.
N1 Calibration App Toolbar Functions
In addition to these core functionality components, there are other features present in the N1 Calibration app that can be activated using the buttons on the top toolbar:
- Reconnect: press this button to reconnect your N1 unit to the N1 Calibration app. This can be essential if your computer has gone to sleep or your N1 unit has powered down.
- Play: press this button to activate the N1 unit and immediately display a current video feed on-screen.
- Primary: press this button to display the primary camera feed
- Secondary: press this button to display the secondary camera feed
- Rotate Counterclockwise: press this button to rotate the displayed camera feed 90 degrees counterclockwise
- Rotate Clockwise: press this button to rotate the displayed camera feed 90 degrees clockwise
- Zoom In: press this button to zoom the displayed camera feed in
- Zoom Out: press this button to zoom the displayed camera feed out
- Fit: press this button to fit the camera feed display to your current window
- Save: press this button to save your settings
- Language: press this button to toggle your language options between English and Korean
Using your NVISAGE N1 With 3rd Party Software
Before connecting your N1 with 3rd party software, you need to make sure the 3rd party software is configured to accept new connections.
To Use Your N1 with GSPRO:
When initially starting GSPRO, please ensure GSPRO is utilizing an "OpenAPI" license type. 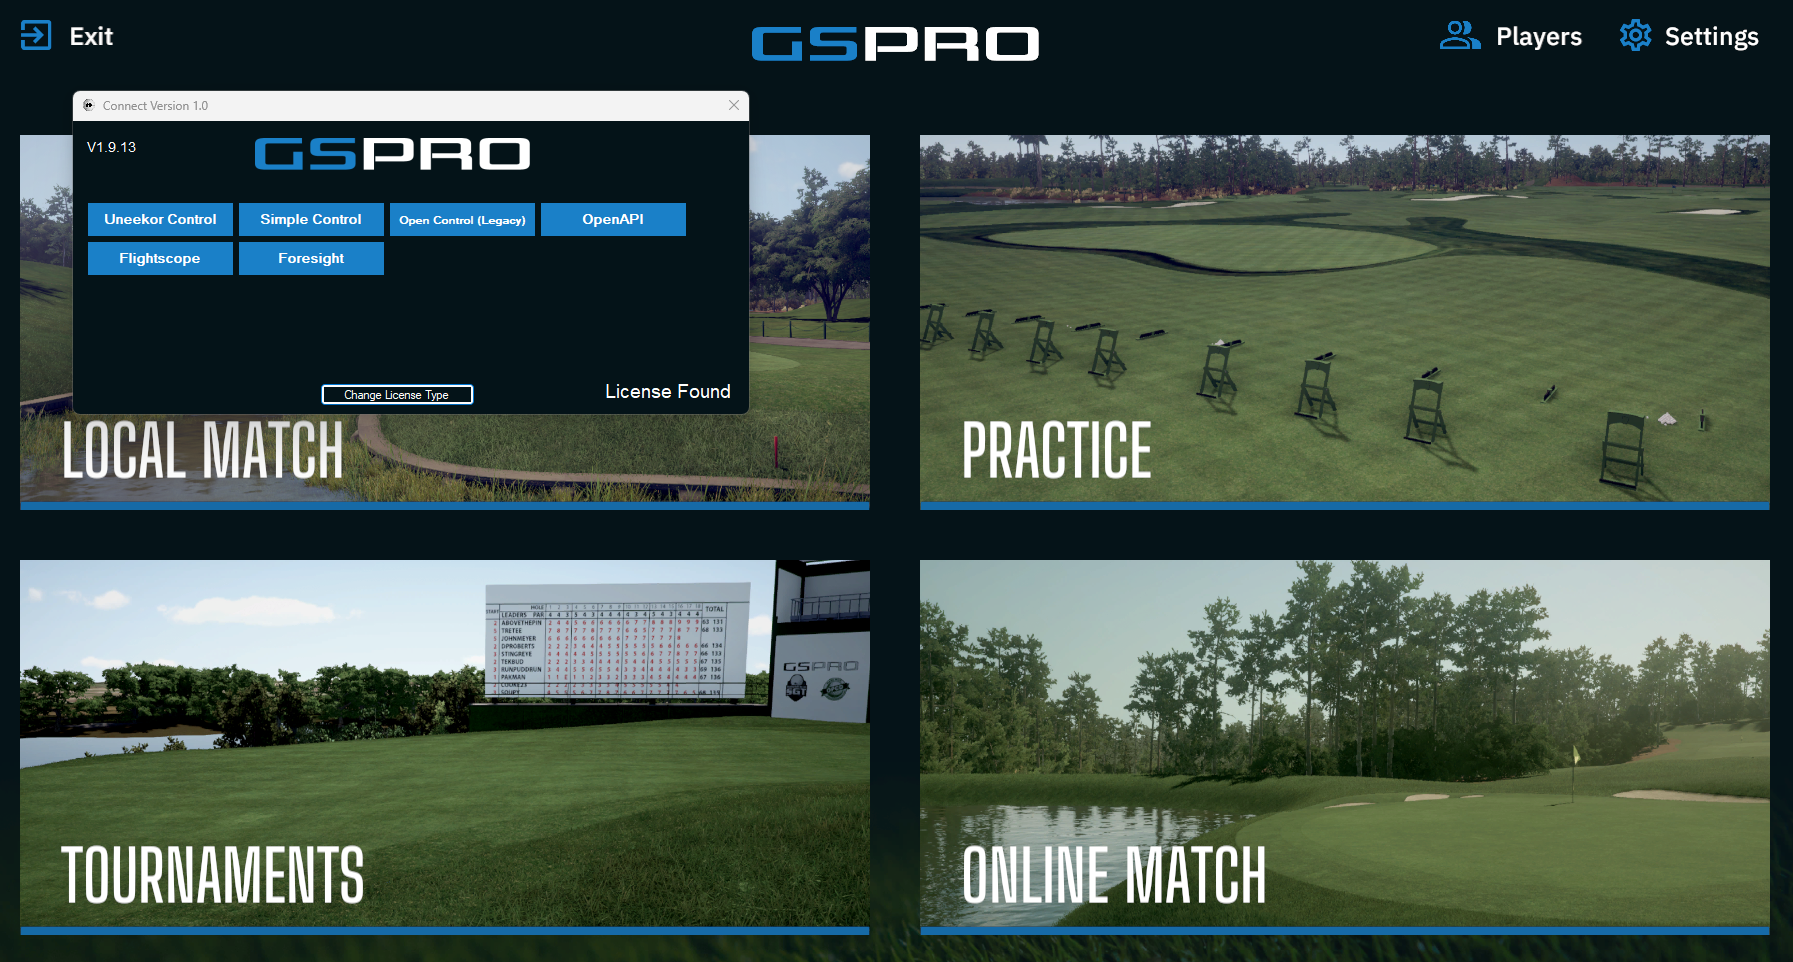
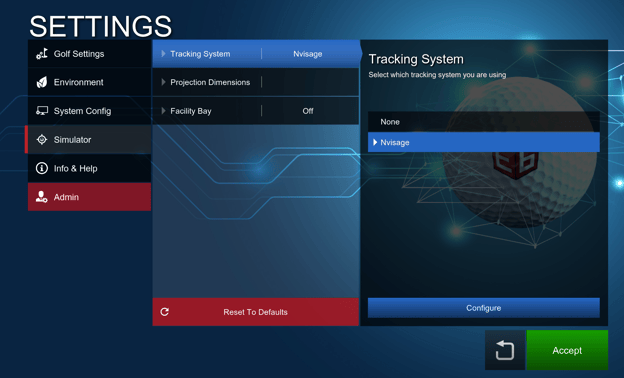
To Use Your N1 with E6 Connect:
When initially starting E6 Connect, click on the "Settings" cog on the home page, then click on "Simulator" from the list on the left, and you should see your NVISAGE N1 device appear on the right. Click on it, then simply click accept.
To Connect Your N1 to 3rd Party Software
Once the prior step is completed, we can actually connect your N1 to your third party software of choice. On your desktop, double click the N-Connect shortcut to open up the N-Connect app. Conversely, you can find it by navigating to C:\Program Files\NVisage\Pio\Tools\N-CONNECT.exe
Once you open N-Connect, you’ll see the following display on the popup applet:
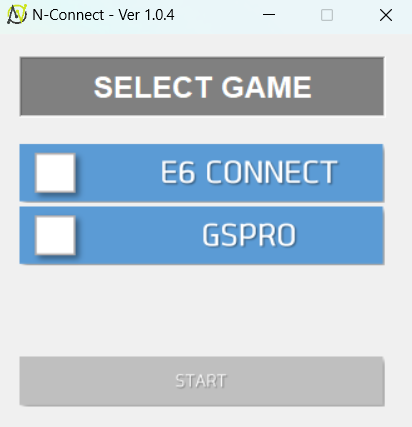
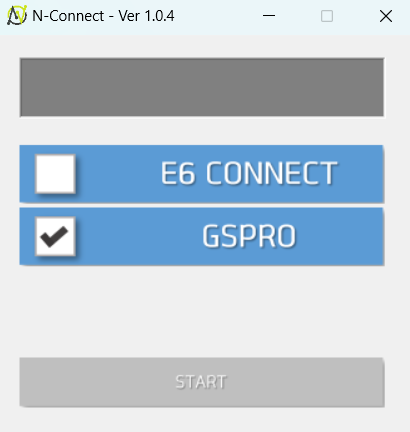
Select your sim software of choice, then press START:
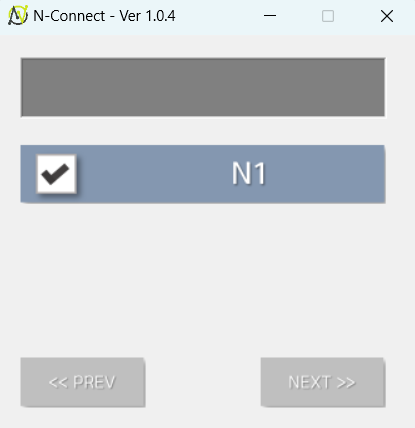
On the next page, select your N1 device:
On the next screen, you’ll see your connection with “DISCONNECT” in red at the top of the window:
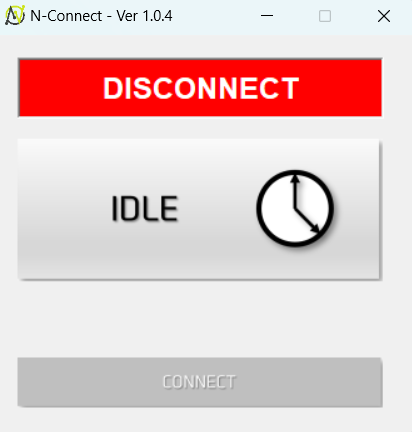
Press the CONNECT button to fully initialize your connection:
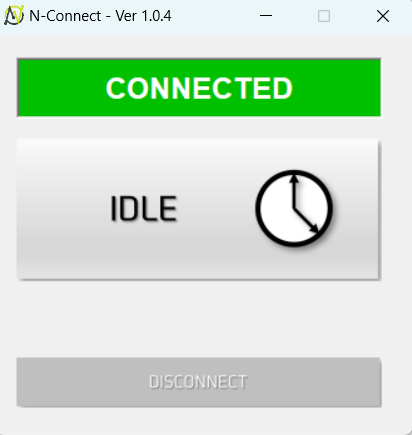
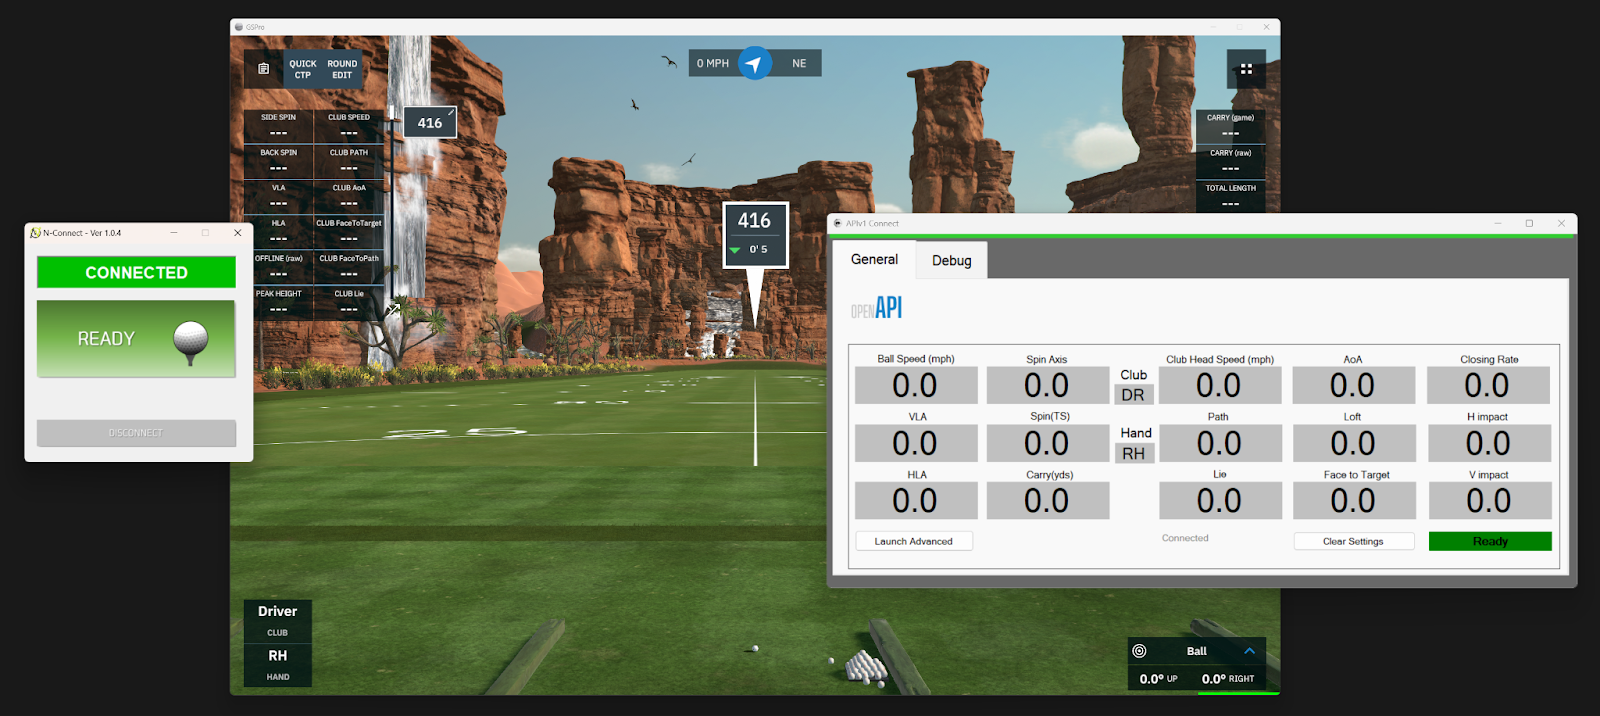
You should now see that you have an active connection in your golf sim software of choice:
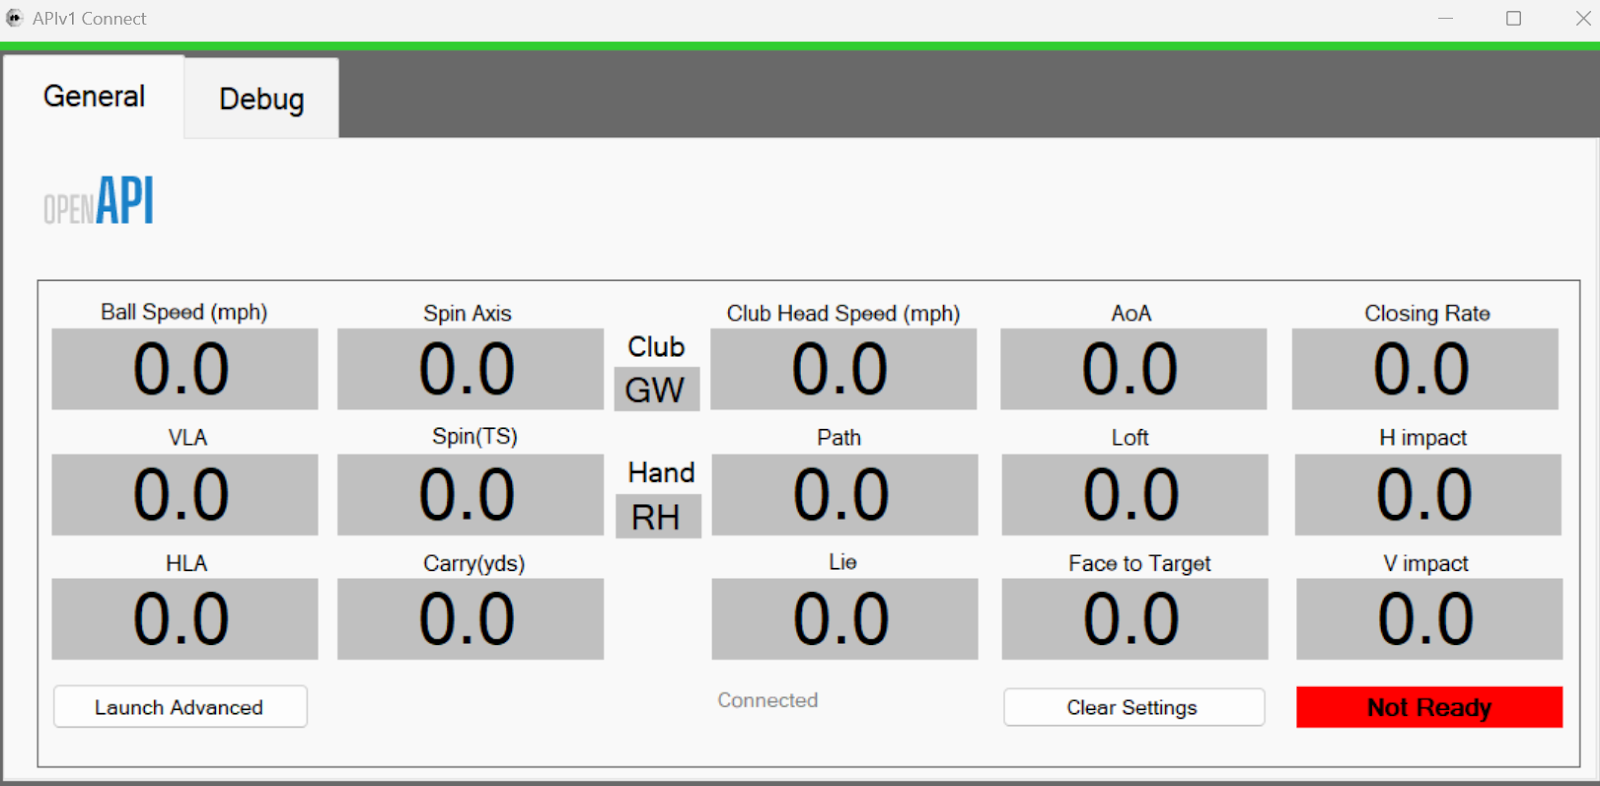
All that’s left now is to open up a course of your choice and take your swings whenever N-Connect indicates that it’s found the ball and is ready to receive your shot: